|
|
Sub Woofer Installation in Fiero's
Basically how I did it
Fractal Images used as background on this page are courtesy of D. Cootey, Copyright (c) 1995-1997. Used with permission.
The following text assumes that you have a certain amount of required knowledge concerning the Fiero interior. This is a guide only and it is the end users responsibility to insure that everything fits. You use this information at your own risk. Vortex Research Inc., myself and/or my assignees will be in no way held responsible for the use or misuse of the following information. No warranties are expressed or implied with regards to the use or misuse of this information.
Meckanic™'s response to e-mail from Mike Shaefer
From - Tue Nov 18 22:51:04 1997
Message-ID: <34728C58.2450@idirect.com>
Date: Tue, 18 Nov 1997 22:51:04 -0800
From: Mechanic™
Reply-To: meckanic@sympatico.ca
Organization: Vortex Research Inc.
X-Mailer: Mozilla 3.03Gold (Win16; I)
MIME-Version: 1.0
To: schaefer@elpaso.net
Subject: Re: fiero subwoofer
References: <347236D5.56FB@elpaso.net>
Content-Type: text/plain; charset=us-ascii
Content-Transfer-Encoding: 7bit
X-Mozilla-Status: 0011
Content-Length: 6813
Michael,
Yep, got it in under the passenger side dashboard, where they put the original subwoofer. What ya have to do, is make a template out of carboard first that fits, into the space between the side at the front where the light is and the  heater box. This cardboard template should extend all the way back to what would be considered a 'firewall' if the motor was in the front. Once the template is made, you can take your choice of 1/2" or 3/8" thick acrylic or wood to made the speaker holder. heater box. This cardboard template should extend all the way back to what would be considered a 'firewall' if the motor was in the front. Once the template is made, you can take your choice of 1/2" or 3/8" thick acrylic or wood to made the speaker holder.
This area will just support an 8" speaker, I used a Kenwood. Now, it has to be ported or you can use a free air sub, up to you, easier with the free air, but if you want to do the job right, do a ported....
To do that, get a piece of 8" OD PVC pipe about 4" high, just a hair higher than your speaker when mounted on the acrylic or wood (and by the way, speaker mounts from the bottom up, that extra 3/8" or 1/2" gives you a little more clearance). If you use 1/2" wall 8" PVC pipe, you can drill and tap the 8" pipe to your speaker mounting acrylic or wood. I also glued mine with silicon when I final assembled it to reduce stray vibration effects. On the top of the 8" PVC pipe, screw down a circular plate again 3/8" or 1/2" thick and screw in place (and glue).
In the 8" Pipe cut two holes 1-1/2" diameter in the sides at the top about 1/2 below the edge on opposing sides. Here, you need to get pair of small tubes about 1-1/2" ID and about 2" long, these get screwed and glued in place as well, these are your ports, since you cannot have one big one, 2 small ones will have to do. Drill one small 3/8" diameter 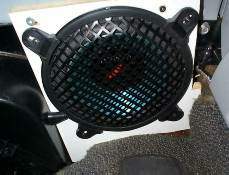 hole somewhere in the side of the 8" OD pipe to pull your wires through. Once you have everything drilled tapped and fitted properly, glue it all together and put all of your screws in and mount to the acrylic or wood mount that you made from the cardboard template. Put your wiring through your wiring access, connect to the speaker and mount the speaker and grill in the ported assembly. Leave yourself about 10' to 15' of wire, preferably #10 or #12 awg polarized, just in case you have to do some funny running. hole somewhere in the side of the 8" OD pipe to pull your wires through. Once you have everything drilled tapped and fitted properly, glue it all together and put all of your screws in and mount to the acrylic or wood mount that you made from the cardboard template. Put your wiring through your wiring access, connect to the speaker and mount the speaker and grill in the ported assembly. Leave yourself about 10' to 15' of wire, preferably #10 or #12 awg polarized, just in case you have to do some funny running.
Now you have a complete assembly, this is slid in on about a 45 degree angle, you may have to remove the light holder temporaily to fit it. Once it is slid right back and flush against the 'firewall' (it will have a slope of about 5 degrees down from the underside of the dashboard), heater box and vehicle passenger side front, drill three holes underneath, through the acrylic/woood mounting plate and into the dashboard, while pressing the mounting plate towrds the front of the car (it has to fit snug!!!. Make sure the drill is small enough to work properly with self tapping screws which you use to mount the plate. Take the assembly back down for a second and drill out the holes in the mounting plate so the self tapping screws clear. Put the assembly back up and screw into place, pushing mopunting plate snuggly in place. When it is done, if you have cut the template/moutning plate properly, you will only need those 3 screws to keep the entire assembly in place and the sucker won't vibrate or jar loose. If you are worried it will jar loose, you can add a couple of small 1" L brackets to the mounting plate and the firewall screwing through the carpet.
As far as speakers go, I used Pioneer 4x10's in the front, no room for anything more and acoustic research mini's in the rear. Sounds incredible, turn the bass down just a little so there is no clipping distortion in the normal speakers and then adjust the bandpass on the amp to give everything below about 200hz a 15db boost. Believe me it works, 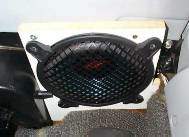 would rather blow a sub twice a year than the other ones every month. To mount the AR mini's, I used little L brackets and bent them down on one side of the speaker to catch the moulding and then took out the hanger clips and mouted the other L brackets there. You have to leave the bottom part of the hanger bracket in place though, or you'll crush the headliner. The amp is mounted behind the passenger seat for easy access and is close to the battery. Head used is a Pioneer DEH-55 CD single, 4 channel, 35 wrms/channel. Make sure you bridge your amp properly as well, follow all those instructions from the manufacturer close. Or you can get clever and use a dual coil 8" sub, but they are pricey and hard to find. I have a JBL one, but I think it will stay on my puter....LOL would rather blow a sub twice a year than the other ones every month. To mount the AR mini's, I used little L brackets and bent them down on one side of the speaker to catch the moulding and then took out the hanger clips and mouted the other L brackets there. You have to leave the bottom part of the hanger bracket in place though, or you'll crush the headliner. The amp is mounted behind the passenger seat for easy access and is close to the battery. Head used is a Pioneer DEH-55 CD single, 4 channel, 35 wrms/channel. Make sure you bridge your amp properly as well, follow all those instructions from the manufacturer close. Or you can get clever and use a dual coil 8" sub, but they are pricey and hard to find. I have a JBL one, but I think it will stay on my puter....LOL
My sub has been rockin at only 170 wrms for a few months....no problems at all, well except maybe a lot of bass...hahaha...If ya have any trouble, let me know and I will pull down my assembly and draw the template in Acad or something, so it can be reprinted full size.
So the parts you need are
3/8" or 1/2" thick arylic or finished particle board - 12" by 24"
8" OD (outside diameter) PVC pipe, 4" long roughly, depends on sub used.
1-1/2" ID (inside diameter) PVC pipe, 2 sections, 2 " long each or so, again depends on sub
3/8" or 1/2" acrylic/wood top cap about 8" in diameter (top for 8" OD pipe)
Silicon Cement/Glue
24 (many) #10 or #12 by 1" or 1-1/2" screws (hardware to bolt together)
3 or 4 self tappping machine screws
8 1/2" screws for mounting sub to mounting plate
2 quick-on's
15' of #10 or #12 stranded polarized dual conductor wire
1 3/8" wire grommet (if you want to be really neat about your wiring through 8" pipe)
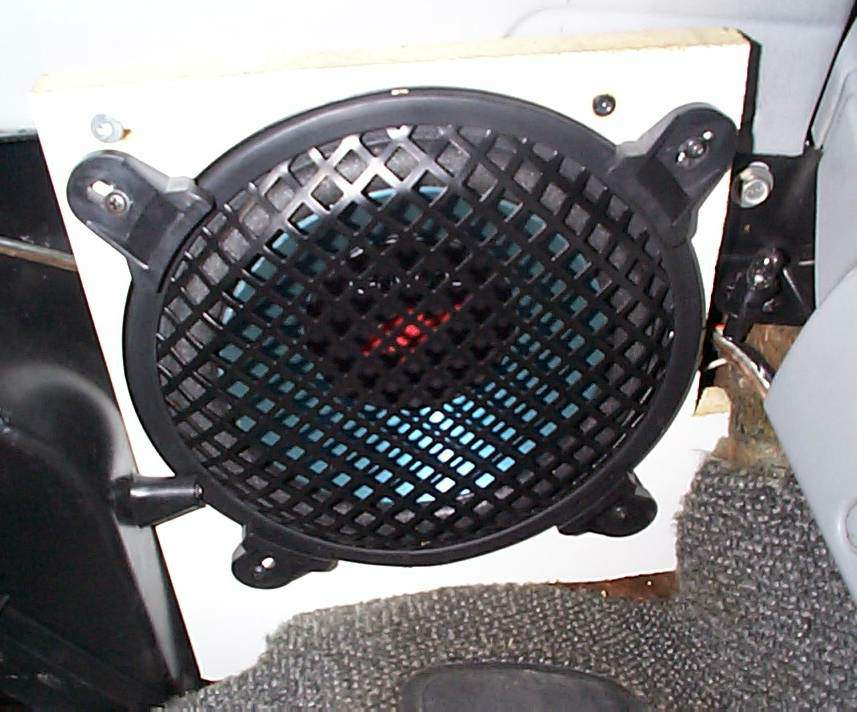
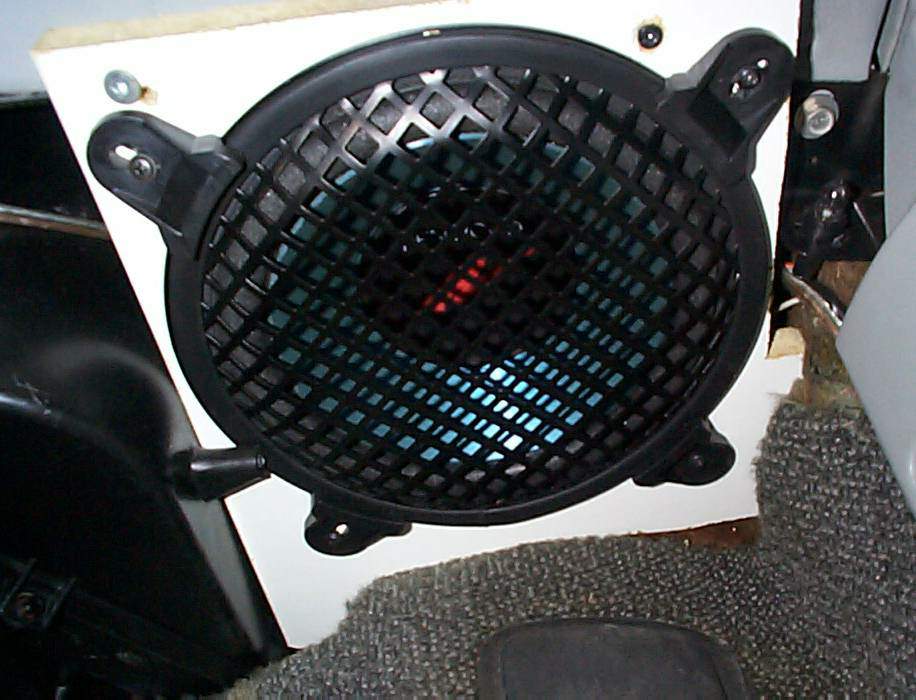
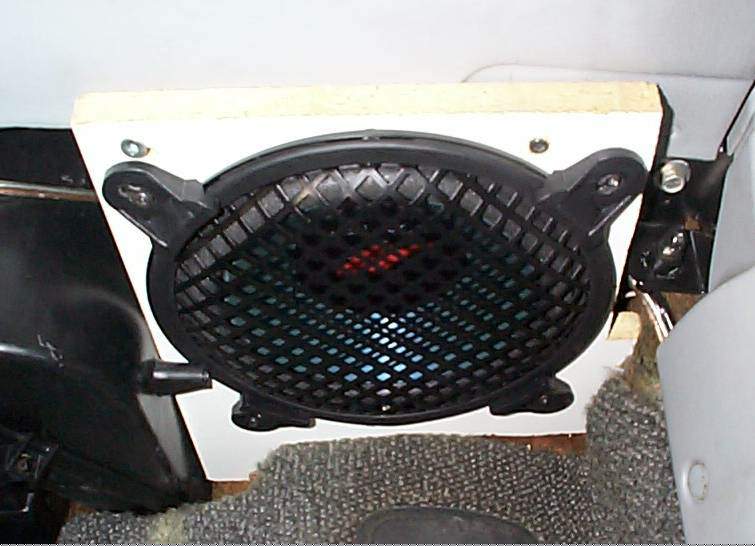
That's about it....have fun....I'll take a picture of mine and put it up in about a week or so for reference if anyone needs visual help.
Later
Meckanic
aka Mechanic
Schaefer wrote:
hi, I'm michael schaefer of worldwide fiero links.
I'm trying to decide on what kind of system to get for my fiero. right
now i have a 6-disc pioneer cd changer, and a 900 watt amp coming in the
mail ($100.00 at www.salesco.com jdl el paso amp!!!). I haven't
purchased any speakers though. i plan on getting a subwoofer and some
boston acoustic 6x9's. How did you install the subwoofer in your
fiero? was it hard to get in? Can you really not see it? Sounds like
my dream come true!
thanks,
mike
************************************************************************************
* that which is not strictly forbidden, is compulsory *
*----------------------------------------------------------------------------------*
* if you love something, set it free...if it doesn't come back *
* hunt it down and kill it *
*----------------------------------------------------------------------------------*
* why is there always time to do a job over, but never time to do it right? *
************************************************************************************
Ok, that is the e-mail I have been circulating around for those of you who need help with mounting that nasty 8 inch subwoofer where it can't be seen. If you use this information, I would appreciate hearing from you. With your problems in mounting the sub, or you can tell me how great the instructions were and how everything went together just like I said. Either way, I like to know, so I can address problematic issues in the future for others. After all, a job well done the first time, is a job well done.
|